Work continued slowly this weekend, mainly due to a myriad of other things that needed to be done, and writing the Saturday off heading to Tailem Bend to photograph Great Southern Railway's new train the Southern Spirit - shown in the photo alongside...
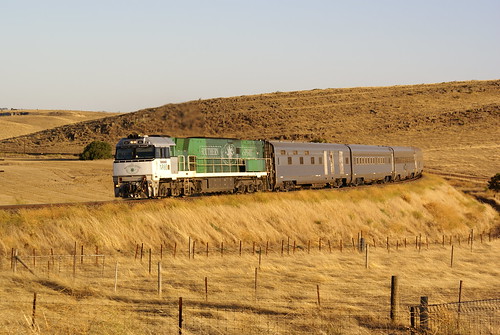 I'm going to diverge from modelling for a moment and look at prototype operations - namely this great looking train... and our long afternoon chasing it...now having seen this train while it was being refurbished in the days when I was working at for GSR, it really was a magnificent sight.
 We headed out to Tailem Bend, knowing that 7AM8 Overland would be due through by 1545hrs - sure enough the Overdue was indeed overdue and having headed out of town toward Coonalpyn, found a good spot and waited along with 400,000 flies for about half an hour, assumed we'd missed it somehow - back to Tailem Bend, as Sarah was wanting food, and Nick and I wanted to have a look at the three "stored"GM's GWA had put aside waiting for the farmers to want their grain transported to Port Adelaide.
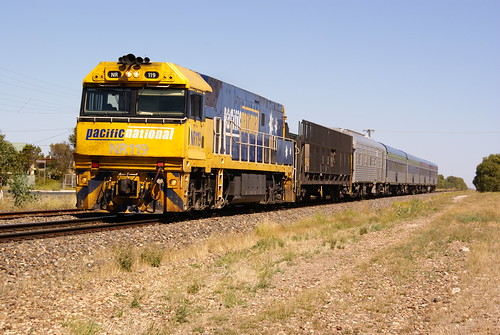 For those who know the Princes highway out of Tailem Bend, you will know that about 4km's out of town, the road crosses over the railway - well it was here I was travelling at 110km/h and Nick shouted at me from the back seat saying he'd just noticed the approach signal to Tailem Bend yard spring into action and a headlight appear in the distance - a quick race down to the nearest crossing and within about 30 seconds 7AM8 appeared with Pacific National liveried NR119 and a measly little consist of AMRZxxx, PCO4, BJ4, RBJ3, BJ6 and BJ10. So after waiting in the 37 degree heat for a hour, the train was past us in a matter of seconds and Tailem Bend went back to its quiet self for a couple of hours.
After stocking up on snacks, we headed off to Murray Bridge for a couple of hours to wait the arrival of 7MA9 The 'Southern Spirit'. After having a look at the stored and boarded up original series 8300 brake van on the old broad gauge branch down to the wharf and the 60' turntable which still exists, buried in the pepper trees alongside the standard gauge mainline. After dinner we decided to head upto the 'famous' Callington curve where we kept an eye on the long grass for brown snakes which I am well aware frequent the area. The ARTC train alteration notice predicted the train arriving at Petwood at 1847hrs, well by 1900 there was no sign of the train, but eventually we noticed a long silver streak sneaking down Warla bank on the other side of the valley - 5 minutes later NR85 appeared with 7MA9. Now the Train Notice said the train would stable at Balhannah, so the procession of train chasers headed off in hot persuit of the train - we headed off to Kanmantoo and Nairne via the sealed road = higher speed. Needless to say, we were well ahead of the train chasers by Nairne, and after a quick detour avoiding the long journey via Littlehampton, we managed to get alongside the loco by the time we reached the eastern end of the Mount Barker Junction crossing loop, where 7AM5 was waiting behind a solo NR class loco. We overtook the train on Junction Road, and managed to get far enough in front to stop for a quick shot. By this time the train chasers had caught up and gone to get a spot in  Balhannah yard, where the train was expected to stable until 0500hrs this morning (Sun 31/1) - well it didn't stop, so neither did we - albeit somewhat confused about the last minute change in itinerary. By Bridgewater we were again alongside, and managed to get a shot near Heathfield (on the Adelaide side of Aldgate). Then onto Mt Lofty - except I had no idea where I was! Somehow, by complete fluke, I found the station carpark and raced down to the platform to find we'd beaten the train by a couple of minutes. Here I spoke with the Train Manager who advised the train was stabling in Mt Lofty due to the length of the train and the Junction Road level crossing at Balhannah being an issue. Here 7AM3 crossed 7MA9, which we photographed from the footbridge before heading to the Adelaide end of the yard to take a couple of time exposures in the fading light.
Balhannah yard, where the train was expected to stable until 0500hrs this morning (Sun 31/1) - well it didn't stop, so neither did we - albeit somewhat confused about the last minute change in itinerary. By Bridgewater we were again alongside, and managed to get a shot near Heathfield (on the Adelaide side of Aldgate). Then onto Mt Lofty - except I had no idea where I was! Somehow, by complete fluke, I found the station carpark and raced down to the platform to find we'd beaten the train by a couple of minutes. Here I spoke with the Train Manager who advised the train was stabling in Mt Lofty due to the length of the train and the Junction Road level crossing at Balhannah being an issue. Here 7AM3 crossed 7MA9, which we photographed from the footbridge before heading to the Adelaide end of the yard to take a couple of time exposures in the fading light.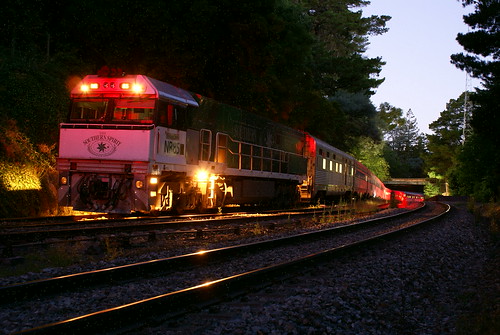
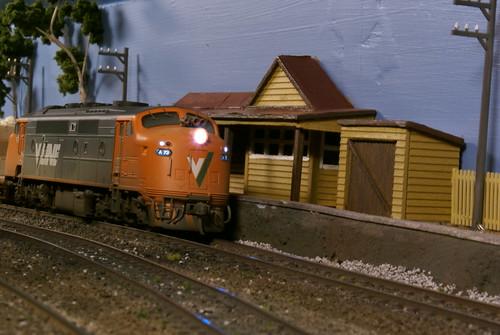
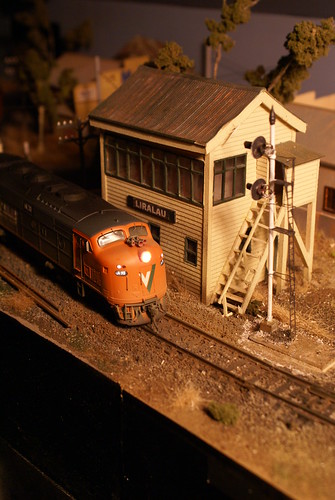
Back to modelling....I set up the layout this afternoon, as the temperature was a little cooler than expected and started preparing the locomotive depot modules for wiring - thankfully most of the existing wiring was in good condition, and having temporarily attached a couple of DCC bus jumpers from the "complete"modules, and after spending a couple of hours cleaning the track - I found I had power to all sidings (even those with insulfrog points - meaning my feeder wires were all still A-OK). So out with B72 and onto the track - first test run was over the no.2 road, back over no.3 road and then down to the end of the loco depot modules. After stuttering a few times due to badly cleaned track - well it looked clean - obviously not!, the loco traversed the newly relaid track with no problems. Then it was onto no.1 road, where I found a rather perculiar problem. The leading wheelset on the no.2 end bogie decided it would leave the track at an otherwise good track join. Having rolled the loco over the section of track in question a number of times, I found the wheelset seemed to be lifting over the rail head, with the flange eventually dropping into the dirt - after testing A73 (same mech) and S312 on the same section of track with no problems, I looked at the loco - not having an NMRA track gauge on hand, I simply turned the loco and test ran it over the same section of track - guess what - no matter the speed or direction - the loco stayed as solid as a brick sh*t house.... go figure! - The only thing I can think of it that wheelset is slightly out of gauge and when that wheelset leads the trailing bogie, the wheelset is being pushed over the rail... has anyone had a similar issue with an Auscision B class?
After that excitment (read frustration), I settled down to run some stock up and down the layout with success - one module to go - but thats for next weekend!