Tuesday, March 20, 2012

Project 620 - the other one...


While i'd been working on my model of preserved 621, i've also had a second loco on go at the same time. This one for my brother's birthday present. He wanted a black 620 with red lining (as per 624 preserved at the National Railway Museum)... so this naturally jumped the queue in order to get it finished for mid march.

I'll provide the details later on, but an overview is as follows:

Body - styrene, RRM 720 class Polyurethane cab (with staff exchangers cut out), brass.
Chassis - heavily kitbashed Mehano USRA light pacific frames (centres cut and shut to be correct), Mehano kitbashed trailing and pony truck (both fitted with SEM wheels), Romford 19mm drivers, High-Levels gear box and Mashima motor
Tender: Heavily cut and shut RRM 720 class tender, SEM bogies, scratchbuilt underframe, RRM marker lights, Model etch air hoses and 710 class tender ladder.

Monday, March 5, 2012

Project 620

This has been one of those idea's i'd had floating around in the back of my head for several years now, but was always dropped into the "too hard basket".

For some reason (maybe an act of madness), I finally decided to get stuck into building an SAR 620 class light pacific. Now, unfortunatley there's no RTR chassis (that i'm aware of anyway) that had the right wheelbase and driver size for the 620, however the old Mehano USRA light pacific (later IHC) was "that close" with wheel spacings about 3mm too far apart - nothing a bit of surgery couldn't fix. More on that later.

I started work on the superstructure first - the lads at Rocky River Models kindly provided me a 720 class cab, two 720 class tender bodies, some marker lights, smoke box door and water treatment equipment castings (Thanks Stu and Peter). The body quickly took shape over a period of three weekends - working in styrene actually made this process easier.


The loco body takes shape

Fast forward a few weeks, and the mechanism had been fitted, and is in the process of having the unique baker valve gear assembled.


Having managed to get rid of a slight bind that was annoying the say the least, the drivers side valve gear is almost complete - just have to fabricate the gear hanger, to enable me to add the eccentric crank and rods.

More to follow.

Saturday, February 4, 2012

OBF Kits Now Available

Hi All,
As alluded to in previous blog posts, my Brother has been working on a kit of the Fabricated OBF 4 wheeled wagon.

The polyurethane kit includes decals, Model Etch brass shunters steps, Model Etch brass handbrake, K&M wheelsets and brass top hat bearings - all of this for $40 AUD. If anyone is interested, contact Nick at sarail507 AT gmail DOT com

Below is a shot of the sample kit I assembled a few months ago - the castings are far better quality now, having been cast by the team from Rocky River Models who were kind enough to look after the casting, as they had access to a vacuum tank.

Monday, November 28, 2011

Building the Strath Hobbies 500 class: Part 2


The next major component to adjust was the polyurethane casting that forms the nose and roof of the long hood. Nothing too difficult here, basically the roof profile is far too flat - but some time with some course-grade sandpaper fixes this quite easily - realistically I should have filed off all the detail cast onto the roof, and replicated it on the re-profiled roof using styrene strip, but having adjusted the radius of the curved sides, this improved its appearance and was good enough. I then drilled out the A end marker lights with a 2mm bit, and then using a cutting disk in the dremel, removed the inner polyurethane walls which have to removed anyway to allow the mechanism to fit.

Once happy with the fit, the nose/hood casting was epoxied into place.

Then it was onto detailing - A set of associated distributors dual-armed windscreen wipers were purchased, and cut in half, providing sufficient windscreen wipers and rear-vision mirrors for one loco - these were soldered into place. Some small model etch lashing rings were then prepared, primed and painted with Floquil Caboose Red and then fitted to the top of the hood casting to represent lift rings. The whitemetal horns and cab vents were then fitted out and soldered/epoxied into place on the cab roof.

The exhaust stack (the angled type) was then filed to shape (out of the box, it looks like a block of balsa) and epoxied into place.

Then it was onto the handrails - theres a fret of the front and rear handrails, as well as a packet of stainless steel handrail knobs for the hood sides - sone .8mm holes were drilled into the side of the hood, knobs glued in and then a length of brass wire inserted through the lot - theres some 18 knobs on each side here, so this takes some time.

Then the hood door handles were drilled out and lengths of brass wire fabricated to represent the handles - these were then soldered from the inside of the hood to secure.

The cab handrails were then added, before the very last step of soldering the runningboard handrails onto each pilot (in retrospect, this would have been better to do post painting, as applying the decals became a real problem).

Once complete, the body was then washed in warm soapy water and left to air dry overnight. The body was then primed and sprayed all over Floquil Caboose Red. Once dry the hood, pilots and cab were masked off, and the runningboards sprayed with Floquil Engine Black.

Once dry, the body was then given an all-over coat of gloss clear coat and decals applied (this was an all-dayer). After many applications of solvaset, the loco was left to dry, before a coat of testors dullcote was applied.

This then allowed me to start on the mechanism. The mech was a Proto2000 S1 mechanism, which had the top weight removed, and the lower running boards filled down by some .5mm to reduce its overall height. The fuel tank was ground off with the trusty dremel and the polyurethane casting expoxied into place. As I was very unhappy with the appearance of the bogie sideframes (they look like shortened Lima C38 class tender bogie sideframes), I manufactured a set of masters for some better looking sideframes with the correct distance between axle boxes for the S1 mechanism. These were then cast by my brother Nick.

These were then fitted to the mechanism and the whole lot given a liberal coat of Floquil Engine Black. A TCS M1 decoder was then fitted and the lighting fitted. I had to make my own coupler boxes using a rather crude styrene and spring steel wire contraption to keep the couplers at a realistic height and ensure no part of the coupler box was protruding from the pilot.

Then once assembled, the whole loco was given a liberal coat of weathering, and the cab was glazed, crew fitted and cab blinds installed. Then it was off to the test track!

Tuesday, October 25, 2011

12 years of difference...


First of all, part 2 of the 500 class construction saga will continue in a later post.

Last night, I took the near complete Strath Hobbies 500 class loco to my brothers layout for a bit of a show and tell, and while I was there, he produced the first 500 I built way back in 1999 (I was in year 7 at primary school) - this was a balsa body which rode on two unpowered Athearn Budd car bogies - at the time, I was very impressed with my work and now moreso, as Given I was 12, it scales remarkably well in the major dimensions, which was suprising.

The new 500 (516) is a brass, whitemetal and polyurethane composite kit from Strath Hobbies, riding on a heavily modified Proto 2000 S1 mechanism.

516 still has a fair way to go in order to be complete, but most of the hard yards are now complete - fitting of a decoder, lighting and fitting couplers still remain - the coupler issue still giving me some grief, as not even a #33 coupler box is small enough to fit between the pilot and the bogie...any ideas would be appreciated!

Sometimes its a nice reminder to see where we've come from as modellers, and gives a bit of perspective when critiquing our latest builds!

Pete

Tuesday, September 27, 2011

Building the Strath Hobbies 500 class: Part 1

This will be a brief description of the construction of the Strath Hobbies 500 class kit, available through End of the Line Hobbies (Victor Harbor, SA).

To start with, purchased a body-only kit as I already had an old Life Like Proto 2000 SW1 mechanism that was dying for some use, having been stored since 2004. The body only kit retails for $250, while the full kit (with a Hollywood Foundry mech) retails for around the $500 mark.

I was visiting my brother's layout "Tookayerta" when it was suggested that a 500 class shunter would be an ideal candidate to shunt the industrial sidings on the "to be built" section of his layout. To my suprise, Nick pulled out a A0 sized general arrangement drawing of a said loco, and then comparisons were made between the drawing and photos posted on the Model Etch website of a built Strath Hobbies 500.

I then decided, that there could be a number of alterations made to the kit to make it better represent the prototype.

The problems outlined were easily fixed - these being:
- Roof profile incorrect
- Bogie sideframes too high and too short
- Lack of general pilot detail
- Cab roof issues
- Exhaust stacks incorrectly shaped

So, off the Victor Harbor I went and purchased a kit. On opening the box, you get a number of brass etches for the hood sides, footplate, pilots, steps, end handrails, cab and a pre-formed cab roof. A bag of whitemetal sideframes, air cylinders, horns, air vents, and two types of exhaust stacks. Then there are also polyurethane castings for the fuel tank and hood roof and nose. A seperate envelope is included which protects the decal sheet for the SAR/ANR Red/Yellow livery - if you want the AN version, End of the Line can supply them.

I also purchased extra detail parts in the form of Associated Distributors single armed windscreen wipers (and mirrors) and Model Etch lost wax air hoses.

As seems to be a common problem with the Strath kits, the instructions leave a little to be desired - but there are some relatively decent resolution colour photos of a completed model included, so it makes life a little easier - the photos were kept, while the instructions were discarded.

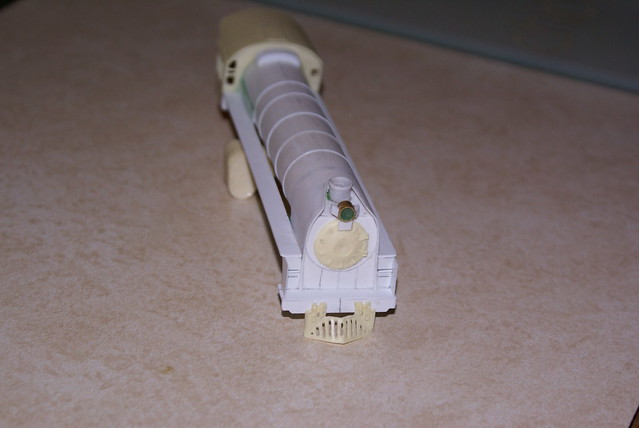
The footplate folds up quite easily, with the etched pilots then being sweated onto the tabs at each end of the footplate. Then the steps are folded up and soldered together - care needs to be taken here, as the A end steps are slightly longer than the B end steps.

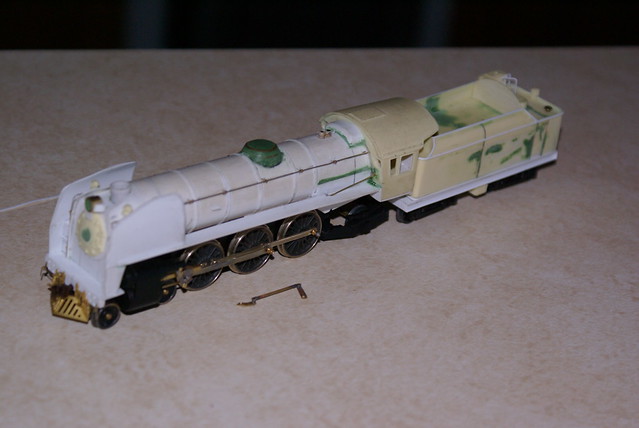
Then the cab was folded into a box and tacked into place with solder - there are some small tabs on the bottom of most parts which fit into slots etched into the footplate - a great idea as it keeps things square (sad I only noticed these after filing a heap of them off!). Once square, I then soldered the cab into place.

Next was the cab roof - this was a two hour job to get sitting square, but with a huge ammount of solder, flux,swearing, patience and burned finger tips (not neccessarily in that order), the roof was fitted and cleaned up using various files, dremel disks and sand paper.

Then it was onto the hood sides - there is a very thin etch with the grilles and various vents - now the kit supplies the air intake vents fitted with later era paper air filters, which if you are modelling a loco from between introduction and the mid 80's you might want to replace the grilles with some fine brass mesh. These needs to be sweated onto the back of the hood etches. Once these are fitted, solder the hood sides to the footplate. Now go and have a beer and relax for a while.

I'll leave it here until the next installment...

Tuesday, September 13, 2011

Liralau loco - reconstruction well underway and other bits and pieces


Hi All,
It certainly has been some time since this blog has been updated - with layout time being greatly reduced by time spent on the south coast with SteamRanger and various other 'home duties' that keep getting in the way, as well as time spent preparing the rapid prototyped masters for my brothers upcoming second version 8300 brakevans - keep an eye on the various web forums for more information - the standard gauge varients and CGP class vans will follow once the orginal version is complete.

A month or so ago, a brief moment of insantity saw me remove most trackwork on the depot modules in order for me to begin their well overdue rebuild - remembering these are the last two of the original modules which had not been relaid during the major rebuild of 2009/2010. Consequently the trackwork was pretty average to say the least, resulting in numerous derailments on badly aligned rail joins, as well as basically rendering the road to the turntable useless by having it situated too close to the mainline, meaning any loco stabled here would be side-swipped by any passing train.

The depot yard arrangement has been changed to allow greater flexibility - a headshunt is now provided, the turntable road now re-slewed away from the mainline and a way and works siding added (this will not be fitted with a powered point motor, as it is really only for looks).

On Wednesday evening, I fitted the point motors, however after securing one, murphy came out to play (damn him!) and one of the point control wires snapped (probably a result of trying to straighten it out) just low enough to ensure as the point was thrown, it would slip out of the hole in the tiebar. My solution was to take a short length of 2.5mm dia. K&S brass tube, heat it with a blow torch and then push it through the tiebar (melting as it went). This gave me an extra 3mm of length on the underside of the point, which will mean theres no way that wire can ever come out (unless it snaps off at the servo itself).

On Sunday afternoon, all wiring was completed and the first ground cover applied - basically a dirt-covered yard covering the turntable road and diesel loco servicing facilities. Now this has had time to dry, I will start weathering the ground prior to installation of structures etc - those structures in the above photo have been temporarily placed into position, and may yet be completely replaced.

Onto other matters:

Last Saturday was the annual Modelling the Railways of South Australia convention - as always a great variety of quality presentations were provided, as was an excellent display of participants models. Of note was Gavin Thrum's beautiful model of light pacific No. 621 (apparently his first ever loco scratchbuild).

A talk was presented on the Penfield Branch - now this would be a perfect exhibition layout for anyone wanting a small(ish) layout, with plenty of shunting posibilities and a regular railcar services..a good layout diagram was provided, but could also be modified into an "around the walls" shelf layout - I'm considering building a small shelf layout in the workshop based on this idea (maybe in a year of so).

The Superchook power car saga has also come to an end, with the cars now back operational - Brian Woods of Junction Models kindly provided two new axles and gears for the spud unit, which didn't initially cure the problem, which was later traced to a slipping worm gear on the motor - a drop of loctite cured that!

Anyway, Until next time - happy modelling!